Tuesday, February 2, 2021

Altered Recipe Card with a FABULOUS breakfast casserole!

 Hello and welcome.  Shelly with you today, sharing an altered recipe card.


My niece recently got married.  For her bridal shower, guests were asked to fill out a provided recipe card for the bride - I decided to go a little above and beyond a simple handwritten recipe (and now she wants me to do all her recipe cards - lol!)

Gather Your Supplies:

Make It:  

  • Cover front and back of card with patterned paper and cardstock (I used white cardstock on the back)
  • Optional - a little machine stitching


  • Next, either hand write or use computer to type up your recipe
  • Add machine stitching if desired, ink edges
  • Add recipe title with alpha stickers
  • Add cardstock sticker using dimensional foam tape for dimension (I used the Perfect Crafting Pouch to "deactivate" sticker first to make it easier to work with)
  • I added an Index Sticker from the paper collection to the top of card - I used a small piece of cardstock cut from the branding strip of my patterned paper to cover a word on the index sticker that did not apply to my recipe

No project is complete without adding Dew Drops as the finishing touch - they add color, dimension and just a bit magic


And finally, since this was a gift, I signed & added a sticker to the back of the card.

Thanks for stopping by the blog today - have a creative week!

Shelly


Sunday, November 1, 2020

How to Make Easy Scrapbook Embellishments from Product Packaging

 I LOVE good product packaging.  In fact, I have been known to buy things based SOLELY on good packaging.

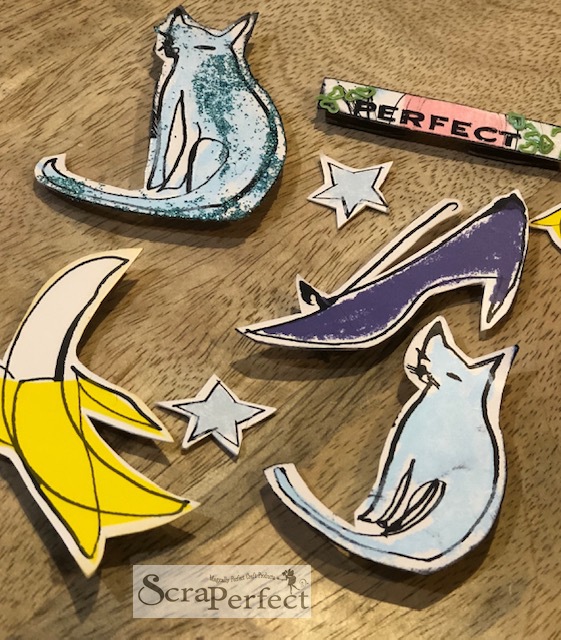
So today, I show you how to make your favorite product packaging into fun, funky (and CHEAP) scrapbook and card embellishments!

Supplies:
Let’s get started….

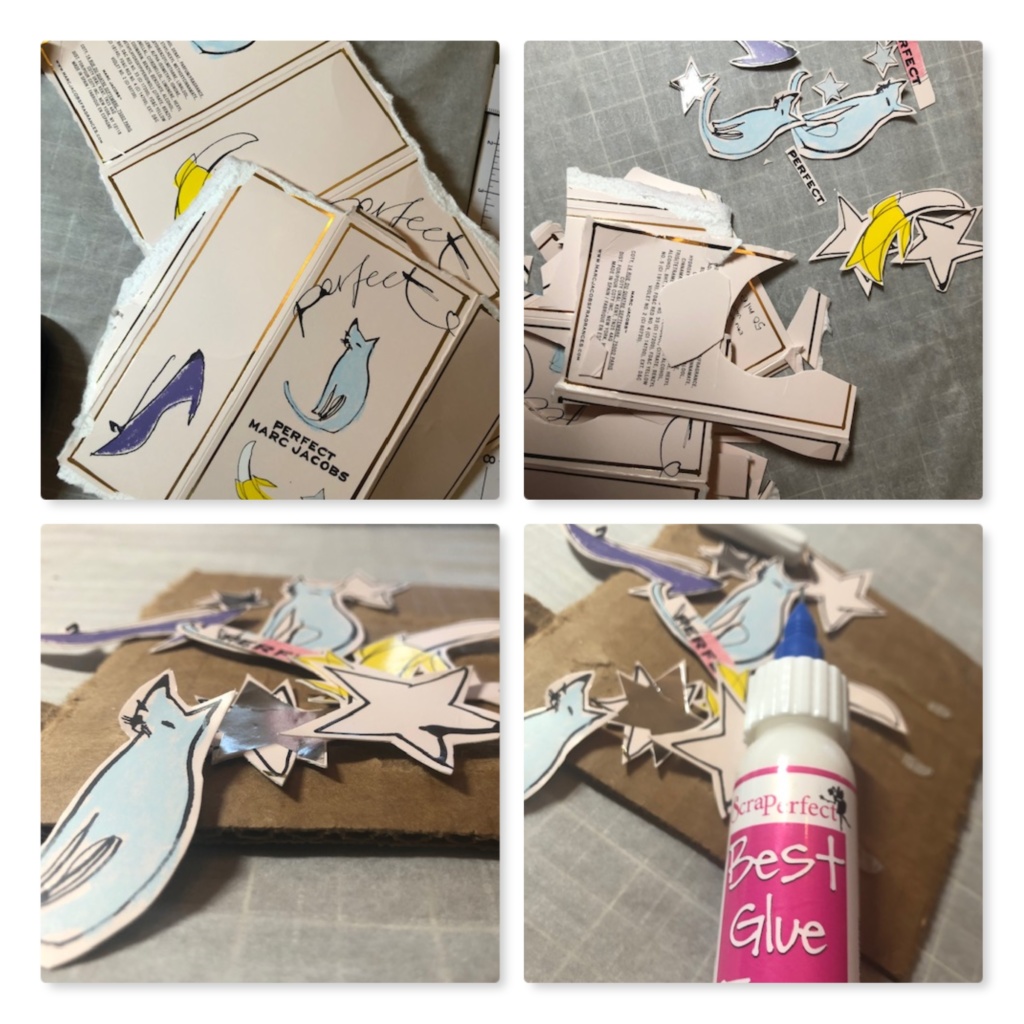
I recently purchased some perfume with the most amazing box (and don’t get me started on the bottle design!)

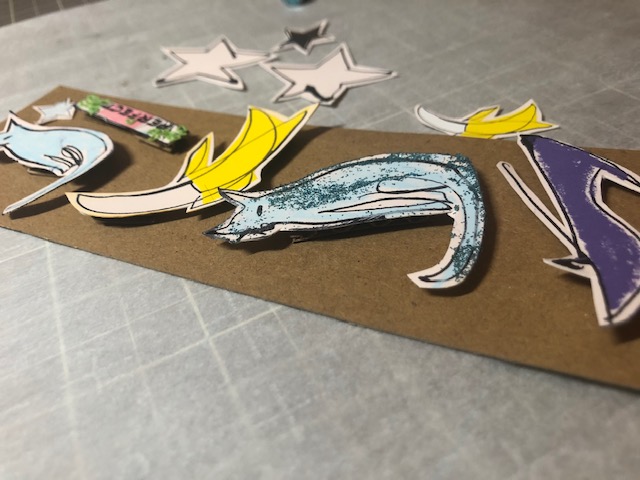
  • I started by cutting out all of the elements I wanted to use from the box.

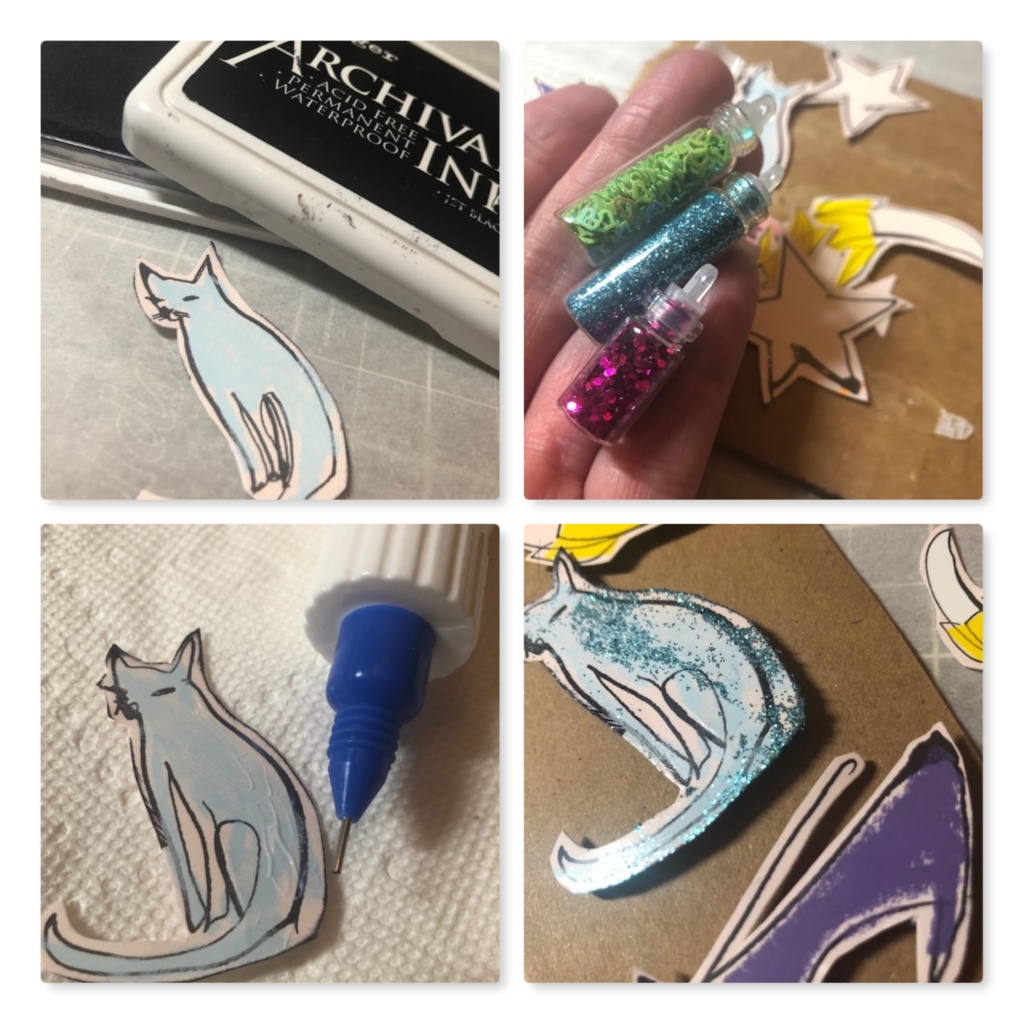
  • Ink the edges – use same color as design or brown / black for contrast – whichever calls to your design aesthetic
  • Next I added some “bling” to some of the pieces, using Tiny Embellishments
  • Rub some BGE on your piece….. Sprinkle … tap ….. let dry
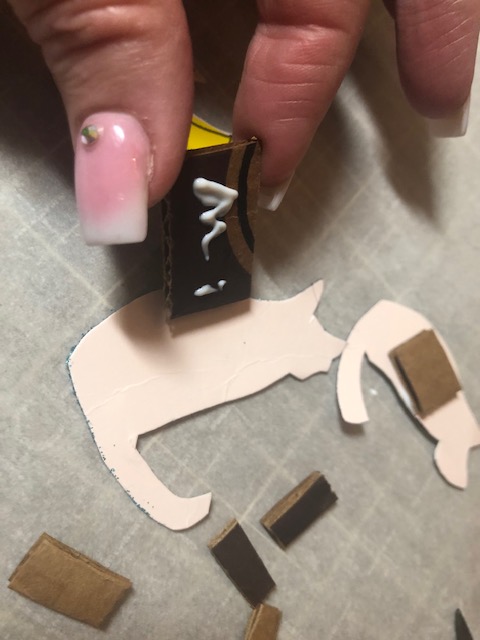
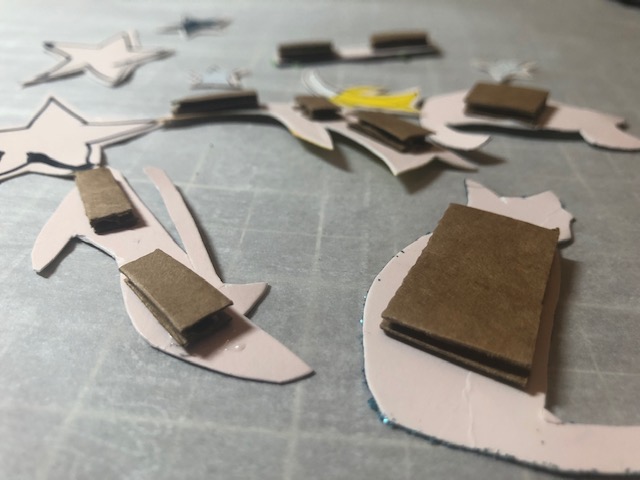
  • Finally I adhered pieces of corrugated cardboard with Best Glue Ever (and the No Clog Writing Cap!) to the back of my pieces (thank you, Penny Arnold for such a great tip!) so that they will be dimensional when  added  to cards and layouts.

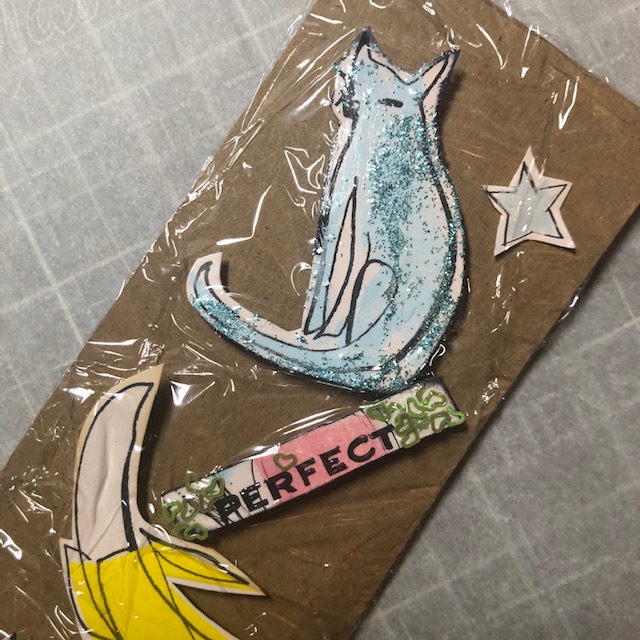
  • To finish, place your new embellishments on a piece of scrap cardstock and cover with plastic wrap to hold in place.

Now you have some amazing, one-of-a-kind embellishments to add to cards and layouts!

Thanks for stopping by the blog today!

Shelly

Sunday, October 4, 2020

One Fish, Two Fish, Undead Blue Fish (Val's Annual Zombie Swap 2020 - Dr. Seuss Zombies!)

 It's a wrap on Val's 2020 Zombie Swap - this year's theme was Dr. Seuss - so much fun and rather challenging me!  But I present to you.... One Fish, Two Fish, Undead Blue Fish!


A rotting, undead fish sitting on his pile of victims!  I used glitter and sequins for scales, and his fangs actually glow in the dark!

Details:

Part of my process creating him:

My zombies are usually on the "cute" side, but I think Undead Blue Fish definitely came out on the "creepy" side - and I am liking it!


I had a love / hate relationship with this project - but once I added the glitter & sequins - - I fell in love!  It is always hard to send my little zombie children off to their new home - hoping my swap partner, Clare loves him!

And remember!  Val's Swaps are open to the public - and not just zombie swaps!  Val hosts the best handmade Christmas Ornament Swap every year - - check it out here:


Thanks for stopping by today! 

Have a creative week!

Shelly


Friday, June 19, 2020

How to Create a Beautiful, Floral Scrapbook Layout for Easter

Hello and thanks for popping by - today I am sharing a beautiful, floral scrapbook page documenting sunrise services on Easter.  This elegant floral design is perfect for any spring inspired page.


While I have created this layout as a 2 page design, each page strongly stands alone as a single page.

Let's break it down....


Supplies:

Best Glue Ever
No Clog Writing Cap
Embellie Gellie
Best Cleaner Ever
Perfect Cleaning Cloth

White Textured Cardstock (cut to 8 x 8)
Patterned Paper - "Painted Blooms" Stampin Up (2 pieces cut 3x8, 2 pieces cut .25 x 8)
Twine - Stampin Up
Acrylic Butterfly - Color Cast Designs
Sequins - The Crafty Pickle
Ink - Colorbox
Foam Dimensional Adhesive

Optional Specialty Tools Used:

Sewing Machine
Banner Punch - Stampin Up
Alpha Stamps - Felicity Jane
We R Memory Keepers Typewriter


I began by stamping my journaling/title and then typing the same words over the top of my stamped words


Are you tired of your polymer stamps looking grungy & discolored?  The Perfect Cleaning Cloth is SO GOOD for cleaning ALL TYPES of stamps!  Spritz on some Best Cleaner Ever and scrub - so gentle but SO EFFECTIVE!


I used foam dimensional stickers to give dimension to my banner pieces - but I always add a bit of Best Glue Ever to make sure they do not come unstuck in the future!


The No Clog Writing Cap works on ALL mediums and allows for precise application (saving your adhesive!)


Embellie Gellie is the perfect applicator for tiny embellishments like sequins and Best Glue Ever dries clear under these opaque beauties.

My favorite thing about this layout?  The very last picture - my boss's daughter and her faithful companion sound asleep together in the back seat on the way home!

Thanks for stopping by today!


Have a creative weekend!

Shelly

Tuesday, May 19, 2020

How to Safely Clean Sticky Grime on Furniture

When life gets messy, you need Best Cleaner Ever!  Shelly with you today sharing my latest "AH-HA" cleaning moment with Best Cleaner Ever.


We recently had our millennial grandson living with us.  After he moved out, I had to do a little cleaning.

This night stand was an icky, sticky MYSTERY MESS.  The room is furnished with inexpensive discount store furniture, so I have to be careful what kind of cleaner I use on it.


After trying multiple different "gentle" cleaners and scrub sponges, I finally had my "AH HA" moment and grabbed my Best Cleaner Ever from the craft room.


I sprayed cleaner directly on mess, let set JUST a minute, and literally WIPED the mess off with my fingertips!  FANTASTIC!

After I finished getting the muck off, I wiped it down with my Perfect Cleaning Cloth (run under cold water and well wrung) and wiped with a dry Perfect Cleaning Cloth (you know you can't just have one Perfect Cleaning Cloth - they are too handy!)


Best Cleaner Ever is:

  • SAFE for hands, tools, brushes, clear & rubber stamps, fabrics, & more
  • Contains 99.9% active ingredients. No water, alcohol, or abrasives
  • Non-Toxic
  • Non-Hazardous
  • Biodegradable
  • Has NO Harmful Fumes
I am always amazed at how well and how easy this cleaner works!  Now, I just need to remember to keep an extra bottle with my regular cleaning supplies!

Thanks for stopping by the blog today - have a creative week!

Shelly

Friday, May 1, 2020

How to Add Quick and Easy Foil Accents with No Tools


I've got a post on the ScraPerfect Blog demonstrating the EASIEST, FASTEST way to add foil accents to your craft projects with absolutely beautiful results using Designer Transfer Foils from ScraPerfect.


Designer Transfer Foils from ScraPerfect – NO TOOLS NEEDED!

A little background... I am creating a scrapbook cookbook of my "go to" recipes.  This recipe comes from the plaid, Better Homes & Gardens Cookbook - my very first cookbook - a Christmas gift from my mother when I was still a teen (who else owns this cookbook? give me shout out in the comments!)

Using Designer Transfer Foils from ScraPerfect is just SO EASY!! And a foil accent just gives such a great POP of WOW on your layout!

  • Apply Best Glue Ever to area to be foiled - a thin layer is all it takes
  • Let BGE "set" until it changes from white to clear
  • Place Designer Transfer Foil over area to be foiled - SHINY SIDE UP!
  • Use your finger to rub foil
  • Pull foil paper away quickly
  • ENJOY your gorgeous results!

Check out this YouTube tutorial:  Designer Transfer Foils

While finishing this layout - I always add Best Glue Ever to my "self stick" Alphas -  better safe than sorry - add that extra bit of glue to make sure your titles STAY STUCK!


Layout Details:

  • Base: 8x8 Kraft/Silver Foil Cardstock - Stampin Up
  • Accent Strip:  4 x 8 Foil Cardstock - Stampin Up
  • Optional:  Machine stitching around both cardstock pieces
  • Recipe/Journaling: 4 x4 white cardstock, black cardstock mat

Embellishments:

  • Chipboard Flatware - QuickQuotes 
  • Crown - Michael's Craft Store Brand
  • Diamond Dew Drops - The Robin's Nest

Thanks for stopping by the blog today - hope you will be inspired to FOIL your next project!!


Shelly

Saturday, September 29, 2018

I need a nurse - STAT! (Zombie Swap 2018)

It’s that time of year.... Val’s Annual Zombie Swap.  Cute, creepy and fun — I am always blown away by the crafty talents of the participants.  This year’s theme was “Employable Zombies” and I received amazing Nurse Josie.....  wouldn’t you love to see her stagger into your hospital room...


The details are amazing!

The nurse shoes are perfection!

And of course, the wonderful little "tuck ins".....


I am mesmerized by this hand made pumpkin!
Thank you, Debbie Walter for a true work of zombie art!

My working girl will be arriving at her new home shortly.... can't wait to share!

Shelly
Reel Girl's Animal House


Wednesday, May 2, 2018

How to Create a Beautiful Butterfly Card for Any Occasion

Hello and welcome to the blog today.

I have created this beautiful butterfly card that can be used for any occasion - give as shown, or add a banner with a sentiment.  Make up several at time so you're ready for any card giving situation.


To make this card, I used:

My card making must haves:
Paper and dimensions:
  • Card base - Smooth White Cardstock cut to 5-1/2 x 8-1/2 folded in half
  • Yellow Textured Cardstock (Bazzill) cut to 4 x 5-1/4
  • Smooth White Cardstock cut to 3-3/4 x 5
  • Scraps of Smooth White CS and Textured Yellow CS for Die Cuts
Everything else:
Now let's make it!
  • Using the Butterflies Die, cut butterflies from white and yellow cardstock - set aside
  • Emboss 3-3/4 x 5" White CS
  • Ink edges of embossed CS and Yellow Card stock
  • Using Best Glue Ever, adhere embossed CS to yellow CS and adhere this stack to card base *remember, a little dab will do ya with Best Glue Ever!
  • Attach Diamond Dew Drop to body of large white butterfly.  The No-Clog Writing Cap allows you add a controlled amount of  BGE in tiny spaces and Embellie Gellie makes picking up placing tiny embellishments a cinch!
  • Attached large white butterfly to yellow butterfly (applying BGE to center of butterfly bodies only to allow them to have movement!)
  • Attach your butterflies to upper 1/3 of your card
  • Next, apply Pearl Dew Drops to the embossed flowers - Embellie Gellie is a remarkable medium that allows you pick up and place embellishments - it's a must for card making!
  • As a final touch, my hand made cards always receive this stamp on the back

This simple card design can truly be used for any occasion!


Thanks for stopping by the blog today - have a creative week!

Shelly